Tuesday, November 15, 2011

Tantalizing Salad Dressing

It was one of those days. I slept in (because I could. not. put. down. the hunger games until I finished it at 1am) so was a little late for work. When I got there I realized the instruments that analyzed my testing from yesterday didn't work the way they should and my work had to be repeated. Then I broke some glass. And then I broke some more. Then I wondered if I should have stayed in bed.

Do we all have these days? Please say you have them sometimes so I don't feel alone in my goofy-ness.

:)

At the end of a kinda messy day like this I make myself reach for a healthy dinner instead of a fast dinner that probably wouldn't help un-muddle my brain. A chicken salad can't be beaten.

For me, what defines whether I love a salad or not is the dressing. Basically everywhere you go a green salad has the same ingredients: lettuce, tomato, cucumber, onion, avocado and any other selection of veggies. So with the main components being consistent, the dressing can really shine and make the difference between whether I finish every scrap of vegetable or pick out the good stuff and go have a cup of tea and a bickie.

When I moved to Ireland 7 years ago I had one bag and had to be very selective about what I brought over with me. My recipe book that I write my all-time favorites into was one of the first things in the bag. And this dressing recipe was the first one I wrote in. Its really fantastic so if you don't have a go-to recipe for salad dressing give this one a go and see if you like it. Its better than any I've ever bought and I hope you like it too!

Ingredients:
  • 1/4 cup apple cider vinegar
  • 1 tsp mustard (I use wholegrain)
  • 1 tsp dill
  • 1 tsp aromat
  • 1/2-1 tsp Maggi seasoning
  • 1/2 cup extra virgin olive oil
Combine the vinegar, mustard, dill, aromat and Maggi in a blender. With the blender on, slowly drizzle the oil into the mixture until combined. Pour into bottles.
Give a good shake before pouring onto salad. Yum!!!

And remember Gordon Ramsey's statement: 'If you pick up a lettuce leaf in your salad and dressing drips off it, there is too much'.

What is your favorite way to make salad dressing?

Peace,

Jenn x

Thursday, November 10, 2011

Spectacular Meatballs!

Aahhhh Thursday ... how I love thee ... Nearly the weekend when I have two whole days where I can focus on my hobbies. Don't get me wrong - I am very lucky in that I really like my job, but I still appreciate a few days when I can spend some hours working on a recipe or taking pictures or ... uh ... less fun stuff like laundry :)

These meatballs are really delicious and freeze very well. They suit me great as they can be slapped together quickly to make a wholesome and tasty midweek dinner. 

There aren't a lot of ingredients for the meatballs, just a few ingredients and some time :)


Mix together the minced steak, grated mozzarella, some oregano, minced onion, minced garlic and pesto. Add a bit of salt and pepper and mix it together a little more again.


Put a little into a hot pan and cook it up, then taste it to make sure you like the flavours. Adjust the seasonings if necessary.


Once you have a mixture you like, shape into balls. I weighed mine out into 72g (my attention to detail means that I wanted a number of meatballs that were all consistent in weight, size and shape. Maybe this is why it takes me so long to complete recipes ...)


I got 35 meatballs, individually wrapped. 

And they are all individually delicious. To cook, I well-browned them in a pan then put them into a pot that had the tomato sauce simmering until finished. Slap the fabulous mix on some cooked spagetti, serve with a green salad and voilĂ  - dinner's ready!


These are really worth trying. I think its the pesto that makes them so delicious, but the stringy mozzarella is a pretty nice addition too :)


Kilmanogue Meatballs (adapted from Avoca Cafe Cookbook)


Ingredients
900g minced steak
110g grated mozzarella cheese
good sprinkline dried oregano
2 eggs
1 onion, minced
1 garlic clove, crushed
4 teaspoons pesto


Combine all ingredients in a bowl and mix well. Fry a small amount and taste, adjust seasonings as needed. Shape into balls. To cook, place meatballs in a hot pan. Cook until well browned, then simmer in sauce of your choice before serving. And enjoy!


Do you have anything nice planned for the weekend?


Peace,


Jenn x

Thursday, November 3, 2011

Happy day-after-the-day-after-the-day-after-Halloween!!

Greetings all!!!

I hope you've had a wonderful few months since my last post. I've been terribly busy and have had a terrible internet connection, which is a real bummer (taking nearly an hour to upload a single picture. Brings out the grouchy in me!). I turned 30, travelled between Ireland and North America twice, had some BIG personal status adjustments and was (thankfully) very, very busy with work. It was all wonderful and I will provide some pictures and info in the next few posts. Unfortunately this poor blog suffered. So now that the evenings are zooming in and I have -finally- upgraded to some wireless internet, I am optimistic. I've been doing some really neat stuff in the kitchen and have been keeping track of it so I will share it here in the coming days.

As a quick hello treat I'm sharing the pumpkins I carved for Hallowe'en this year.
Did you celebrate Hallowe'en?

Peace,

Jenn x

Monday, June 27, 2011

From Phyllo to Backlava! Daring Bakers Challenge June 2011


Honestly, I was trying to come up with some excuse for why I couldn't complete this month's challenge. One reason: i.n.t.i.m.i.d.a.t.e.d. I just didn't think I would have the patience, time or ability to do it. And I'm not a fan of backlava. Ok there. I said it. I made it once a few years ago and just didn't like it, so I wasn't too excited about the challenge. Now that I've finished it though, I'm delighted I did. I can now say I made my own phyllo pastry.

And I will never be doing it again. I figure its like climbing Mt. Everest. Its an awesome achievement, but once in a lifetime is enough.

Ok well maybe its not as extreme as climbing Everest, but its my baking equivalent :)

Here's a link to the recipe which has some really great tips on how to roll out the phyllo.

As I have a 90th birthday cake to make (I'll post it next week :), I'm just going to give you what I did in stages.

First I had to make the phyllo and roll it very, very thin. I made a single batch of recipe and it took me nearly 4 hours to roll it out.
 Nearly see-thru
Once I had the dough done and nicely covered I started processing the nuts. Instead of going for the walnuts and pistachios listed in the recipe (not really a fan of walnuts, which may have contributed to my dislike for the first version I made years ago) I emptied out my cupboard and used the different types of nuts I had on hand.
 
In the end I had cashews, pecans, hazelnuts, almonds and brazil nuts. So I threw all them with a cinnamon stick, a pinch of allspice and some sugar into my mini-processor.

Isn't it cute?
Its so tiny it took a few goes but I finally ended up with bowl of deliciousness ...

 A thought it was stuffing, so he grabbed a spoon and dug in. He had quite the look of shock when he realized it wasn't actually stuffing, but he said it tasted awesome. I had to use my rolling pin to get him out and make sure I had some left for the backlava!
 
After multiple butter-phyllo-butter-phyllo-butter-phyllo-butter-phyllo-butter-phyllo-nut mix-butter-phyllo (you get the idea) it was ready for the oven. When it was finished I poured the syrup over the crispy deliciousness and just left it swimming for the night.

 
Swimming in syrup
I was a little worried it would be too much syrup, but by the morning ...


All gone!!

The syrup had all soaked in! I was surprised.
I had to try a slice ...


...and it was totally delish!! So nice, I have to get it out of the house ... my hips don't need this delicious, pastry, nutty, syrupy treasure hanging around. Good thing I have a 90th birthday party to take them to :)

Try it sometime. Just make sure you don't have anything else planned for the evening :)

Peace,

Jenn x

Tuesday, June 7, 2011

Chocolate Marquise on Torched Meringue with Tequila Caramel - Daring Bakers May 2011

The Daring Baker's challenge this month totally blew me away. The first thought I had after reading it was 'WOW!!! That looks totally amazing!!'. My second thought was 'how in the heck am I going to get all this done?' While I love cooking in pretty much any form and enjoy trying new things, there are a lot of steps in this dessert that needed to come together. Its taken me what feels like -ages- to figure out how to get all the components of a roast dinner to all finish at the same time, so the meat, veggies and potatoes are all warm. There was a lot of cold Brussels sprouts, lukewarm potatoes and carrots served with meat hot out of the oven. Timing is not my forte.

One fantastic thing about Daring Bakers is that there are some people that go mad into trying out the recipe the minute it has been posted, so they come back with tips and suggestions to make the challenge run more smoothly. Which is awesome for someone like me.

The suggested modus operandi was to start with the marquise, which needs to freeze, preferably overnight, then make the meringue, finishing with the tequila caramel. So I followed that instruction, and it worked perfectly.


Let me just say, this was A.M.A.Z.I.N.G!!! Nicest dessert I have ever had. Period. And I'm a sweet tooth kinda gal, so I've done the research. The marquise, once thawed, is like a chocolate mousse. I used ginger chocolate to make it so there was the sweet heat off the ginger against the hit of the cayenne chili pepper and the sweetness of the chocolate. The meringue was as light as air and totally fabulous. It was a little sweet, but it was set off by the bitterness and heat of the marquise. They went together well. And the tequila caramel, well it was the best caramel I have ever tried. All together, they combined to produce a magnificient delight. I couldn't believe I had made this and it was relatively easy, once I got organized. This will be the dessert to impress guests with. So if you come over and I feed you this, know you are a valued visitor. If I don't, you're still a valued visitor. I probably just wasn't organized enough :)

Try it sometime! Here's the link to the recipe.

Hope you had a wonderful Tuesday :)

Peace,
Jenn x

Thursday, May 26, 2011

Ultimate Quick Comfort Food - Lazy Carbonara

Hmm ... a bit of a hiatus, eh?


Can we just pretend I've been posting stuff all along?

Its odd. I have been cooking and baking and seeing neat stuff around this beautiful corner of the world I'm in, and I have been taking my camera along on every step and stir and taste and chat of the way, yet I haven't been updating. Motivation = zilch.

So my most sincere apologies if you've been checking and my laziness has annoyed you. I've been thinking about you if that makes it any better :)

I'm going to return with one of my favorite comfort foods. Carbonara. It is quick, easy, cheap and super tasty. Its not very waistline-friendly, so its a very infrequent treat in our house. But its so good that literally every single time I ask A what he wants for dinner he responds with 'Carbonara'. Quick. He even makes it a single syllable. He'd have it every night of the week. Good thing I'm here to force feed him veggies once in a while :)

Here's how I make it:

Ingredients

6 Smoked rashers with fat trimmed (or you could used back bacon, just make sure its smoked)
1 pint mushrooms
cream
pasta (I used fresh tagliatelle and spaghetti. Cause its what I had open :)

Ignore the bag of peas. I usually put them in, but I forgot :)
 
Slice the rashers and mushrooms and toss into a dry pan. Stir them around while they start to cook. Meanwhile, start a pot of water boiling.
When the rashers and mushrooms start looking like they're nearly done, throw in enough cream to cover the bottom of the pan. If your water is boiling, throw in the pasta (as I used fresh, it only needed a couple of minutes. If you're using dried, have the pasta in boiling water before you start prepping the sauce).

 Let it simmer down until the cream thickens to your desired consistency and dump the cooked pasta right in with it.


 Give it a stir around and let it continue to cook together until it gets to the point you want. I like very little sauce and for the noodles to soak up the creamy-bacony-mushroomy deliciousness, but if you want more of a sauce just add more cream or take the whole beautiful concoction out as soon as you've mixed it all together.


Serve to rapturous applause
How do you make carbonara? What's your favorite comfort food?
 
Quick heads up - this months Daring Baker's challenge is aw-SOME! Make sure to come back tomorrow to see it. So so so good.
 
Hope your week is going well :)
 
Peace,
Jenn x 


Tuesday, April 12, 2011

Baby Shower Cake

For the last year or so I've gained an interest in cake decorating. I love the process of baking and cooking, but if its something sweet I need to get it out of the house. So I'm a good neighbour to have :)

When I moved here I spent more time than I should have in the local kitchen supplies shop. Seriously, that store is bad for my budget. As in, my budget gets completely ignored when a cute cookbook holder is staring at me.
While in the shop I saw that there was a cake decorating class going on, so I signed up. The objective of the course was to learn the techniques involved in decorating a cake. We worked with sugar paste (sometimes known as fondant), royal icing, learned how to make a piping bag out of parchment paper (which I felt was the most useful tip), piping, gumpaste and different cutters and ways to use them. It was one night every 4 weeks, 2 hours a go. I am surprised how much we fit in considering we only had 8 hours! 
The instructor would start building something and then we'd follow suit. So the first week we learned about rolling out sugar paste and covering a cake and cake board. I also learned to use a crimper to add some depth to the top edge of the cake. In the second week I learned about piping. We were given templates to follow which had a bunch of different shapes to replicate. Most of them involved piping the tiny dots, which were actually harder than I thought they would be, but after practicing a bit it got easier. I need a lot more practice but I was surprised how quickly I got into a groove with it.
In the third week we started working with gumpaste, which is used to make more stable items (the booties, crib and bib on the top of the cake are made from gumpaste). It hardens very quickly which makes it a little challenging to work with, but its very useful if you want to make something that requires some structure (like chairs). We also worked on the lacy frilly things around the edge of the cake, which I struggled with but will just have to practice more :)
In the final class we finished off the cake by using puncher cutters to cut out flowers and stuck them around the cake.
I really enjoyed the class. It was great for learning the basic techniques that I could take away and apply to make the type of cakes I am interested in making, like the Ambulance Cake or the Jersey cake. I wouldn't necessarily make a cake like the one we made in class (I wouldn't cover a cake for a boy's baby shower with flowers or frills, for instance. Maybe ships and bikes or something) but it was really great for learning the basics. 
But I still loved it :)

So have you ever pursued something you enjoyed from afar for ages before taking it up?

Peace,
Jenn x

Sunday, April 3, 2011

Limerick Jersey Cake

Is March a big month for birthdays in your world? I have my mom, A (boyfriend), brother, and A's mother all in March. Which is great, as I like to get the important ones out of the way, but March does seem to sneak up on me. I keep forgetting it comes after February :)

I decided to make A a cake that looked like the jersey of his county. He is a very proud Limerick fella so I knew I had to make a solid effort to do it well. This is my first cake so it is pretty rough, but I still enjoyed the process.

Here's what a Limerick jersey looks like (courtesy of the online GAA store):


And here's what I ended up with:


Whaddya think? Does it look like the original?

I started out by making a chocolate biscuit cake, which was very easy and was a great medium to work with. Its fairly rich so a small chocolate biscuit cake would go a lot further than a sponge or Madeira cake of the same size.

To make the cake, I melted together 300g of dark (70%) chocolate with 300g unsalted butter and 4 tbsp golden syrup (or corn syrup) in a bowl over a pot of boiling water.


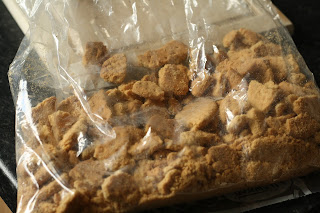
To that I added 450g of digestive biscuits I bashed with a rolling pin (very therapeutic!)
I lined a 8 inch square pan with plastic wrap and poured the mixture into it and stuck it into the fridge overnight until it set. Once it was ready, I cut a chunk off to be left with a 8 in x 5.5 in rectangle and I cut two triangles out of the remaining 8 in x 2.5 in piece to make the sleeves.
I put a section of white sugar paste at the top where the opening for the neck is and covered the rest in green sugar paste.
I then piped on the details and put a trim of sugar paste around the edges as I cut it a little short on the cake.
I really enjoyed putting it together and it went down a storm. I may make one of the county I support for my birthday :)

So what are your hopes for April? I hope you and yours have a wonderful month!

Peace,
Jenn x
free counters

Wednesday, March 30, 2011

Ambulance Cake

For the last year, I have constantly heard from A's mom how much she was looking forward to retiring. Her enthusiasm for retirement was matched by her determination to NOT have a party.

We received the printed invitations a month before the party.

I took a cake decorating class this month so I asked if she would like me to bring her a cake. She had enough on her plate with organizing sandwiches, drinks, snacks, mass in the house and following evening at the pub, so she said she would let me take care of that. I talked about the cake with A and he thought that as she worked on the ambulance service for years that it would be a good idea for a cake. A little ambitious, but it was worth a go.

First step was doing a bit of research to find out what they actually looked like. The ambulance A's mom worked on is different than the fleet in use in Ireland today so it took a little digging to find the right model. I found a link here and worked off that. Take a look at that link before going down to see what I did.

Did you go look at the link?

Really?

Cause you won't know how awesome my representation is unless you can compare it to the real thing.

Done?

Ok.

So the technical stuff. I made 2 each of chocolate and vanilla Madeira/sponge cakes. I split them all in half to get 8 layers. Then I made 2.5x Whisk Kid's (totally-unbelievably-awesome) Swiss Meringue Buttercream recipe, which just barely filled the layers and covered the cake. Then I covered it with sugar paste (or fondant, depending on which continent you live on) and added the detail. Oh - and I made rice krispie squares into wheels. Rice krispie circles into wheels? I ran out of time so I missed a number of details but it had to go to the party so I got as far as I could. Here's how it turned out:

The back view
I snuck it into the pub before all the party arrived so there was a bit of surprise when I brought it out. A's mom was delighted with it and she knew what it was, so my mission was accomplished. A few ladies actually started shouting 'Nee-naa! Nee-naa!' trying to sound like ambulances. It was great. But the hardest part of my evening was about to begin.

I know it looks really rough but I spent a lot of time on that cake. The bones of 2 days! So I wasn't at all prepared for when I was asked to cut it. I didn't even think about the fact that it was meant to be eaten in all the time I was putting it together. I felt blindsided. Seriously, I was near tears. All that work to disappear into people's bellies. But I did feel a little better when I saw how the inside looked:

I thought it looked pretty good.

And everyone loved it. Which was the most important part.

So did you put a lot of work into something only to despair at its short life-time?


Peace,

Jenn x

Monday, March 28, 2011

Yeasted Meringue Coffee Cake - Daring Bakers Challenge, March 2011

Man I've been offline for a while, eh? Sorry.

I got a new job a couple of weeks ago, which is great. I'm really enjoying it and it feels good to be doing chemistry again after my hiatus. I've also been out of town the last two weekends, so I've literally been going non-stop for the last 2 weeks. While I wasn't working I filled my days pretty well with cooking, baking, cleaning, exercising and blogging. Unfortunately, I'm barely keeping up with cooking, let alone everything else! This working thing ... I'm not so sure I like it so much :)


Anyway, this month's Daring Baker's challenge was fantastic. It was hosted by Jamie of Life's a Feast and Ria from Ria's Collection. The first time I read the challenge I knew it was going to be a good one. I love meringue but never thought of putting it into a loaf. It just melts into the bread and flavourings and is just ... well ... beautiful! I highly recommend it. I'll be making it again for sure!

Here's how I made it:

FILLED MERINGUE COFFEE CAKE


Ingredients
For the yeast coffee cake dough:
2 cups flour
1/8cup sugar
1/4 teaspoon salt
1/2 package active dried yeast
3/8 cup whole milk
1/8 cup water (doesn’t matter what temperature)
1/4 cup unsalted butter at room temperature
1 large egg at room temperature
1/2 tsp almond extract

For the meringue:
2 large egg whites at room temperature
1/8 teaspoon salt
1/4 teaspoon almond extract
1/4 cup sugar


Fillings
100g slivered almonds
100g dried apples
2 tbsp cinnamon
150g dark chocolate, chopped
In a large mixing bowl, combine 3/4 cups of the flour, the sugar, salt and yeast. In a saucepan, combine the milk, water and butter and heat over medium heat until warm and the butter is just melted. With an electric mixer on low speed, gradually add the warm liquid to the flour/yeast mixture, beating until well blended. Increase mixer speed to medium and beat 2 minutes. Add the egg and 1/2 cup flour and beat for 2 more minutes.
Using a wooden spoon, stir in enough of the remaining flour to make a dough that holds together. Turn out onto a floured surface (use any of the 3/4 cups of flour remaining) and knead the dough for 8 to 10 minutes until the dough is soft, smooth, sexy and elastic, keeping the work surface floured and adding extra flour as needed.
Place the dough in a lightly greased (I use vegetable oil) bowl, turning to coat all sides. Cover the bowl with plastic wrap and a kitchen towel and let rise until double in bulk, 45 – 60 minutes. The rising time will depend on the type of yeast you use.

Once the dough has doubled, make the meringue:
In a clean mixing bowl – ideally a plastic or metal bowl so the egg whites adhere to the side (they slip on glass) and you don’t end up with liquid remaining in the bottom – beat the egg whites with the salt, first on low speed for 30 seconds, then increase to high and continue beating until foamy and opaque. Add the almond extract then start adding the 1/4 cup sugar, a tablespoon at a time as you beat, until very stiff, glossy peaks form. Line 2 baking/cookie sheets with parchment paper.

Punch down the dough. On a lightly floured surface, roll out the dough into a 20 x 10-inch rectangle. Spread the meringue evenly over the rectangle up to about 1/2-inch (3/4 cm) from the edges.
Sprinkle your filling of choice evenly over the meringue. Roll up the dough jellyroll style, from the long side.
Pinch the seam closed to seal. Very carefully transfer the filled log to one of the lined cookie sheets, seam side down. Bring the ends of the log around and seal the ends together, forming a ring, tucking one end into the other and pinching to seal. Using kitchen scissors or a sharp knife (although scissors are easier), make cuts along the outside edge at 1-inch (2 ½ cm) intervals. Make them as shallow or as deep as desired but don’t be afraid to cut deep into the ring.
 Cover the coffee cake with plastic wrap and allow it to rise again for 45 to 60 minutes.
Oozing meringue. Yummmm!!!
 Preheat the oven to 350°F (180°C).
Brush the tops of the coffee cakes with the egg wash. Bake in the preheated oven for 25 to 30 minutes until risen and golden brown. The dough should sound hollow when tapped.
This was really delish. The dough was lovely and the flavour and texture of the meringue was really nice. I would probably leave out the apples and chocolate next time I make it as the almonds and cinnamon were the nicest bits.

 So next time you have company coming for tea, throw this together. You won't be disappointed!


Peace,

Jenn x